What you’ll need
- Android phone (Android 10 or later recommended).
- Install JSS CallBlocker from your test track or Play (when available).
First run takes ~1 minute: set default Caller ID app, grant Contacts and Call Log permissions.
1) First launch & permissions
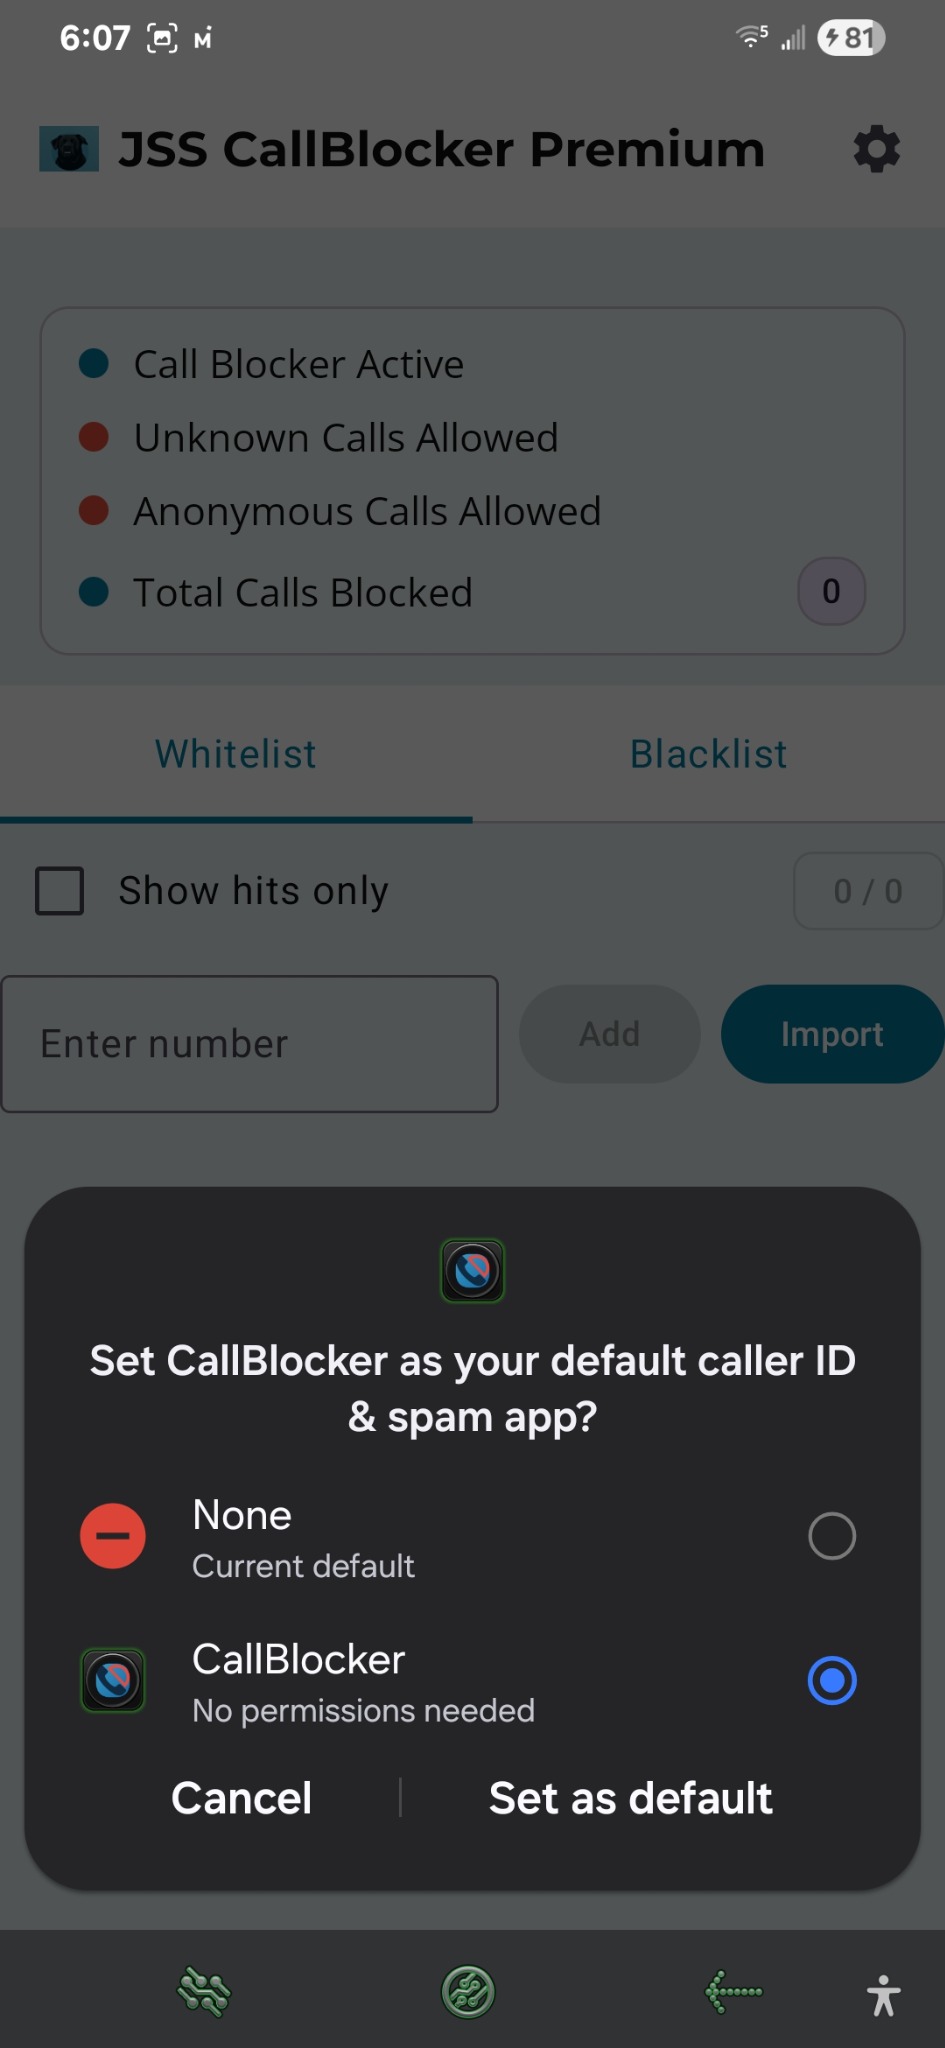
Set CallBlocker as your default Caller ID & spam app
Android requires a single default app to identify/handle caller ID events. Tap Set as default when prompted.
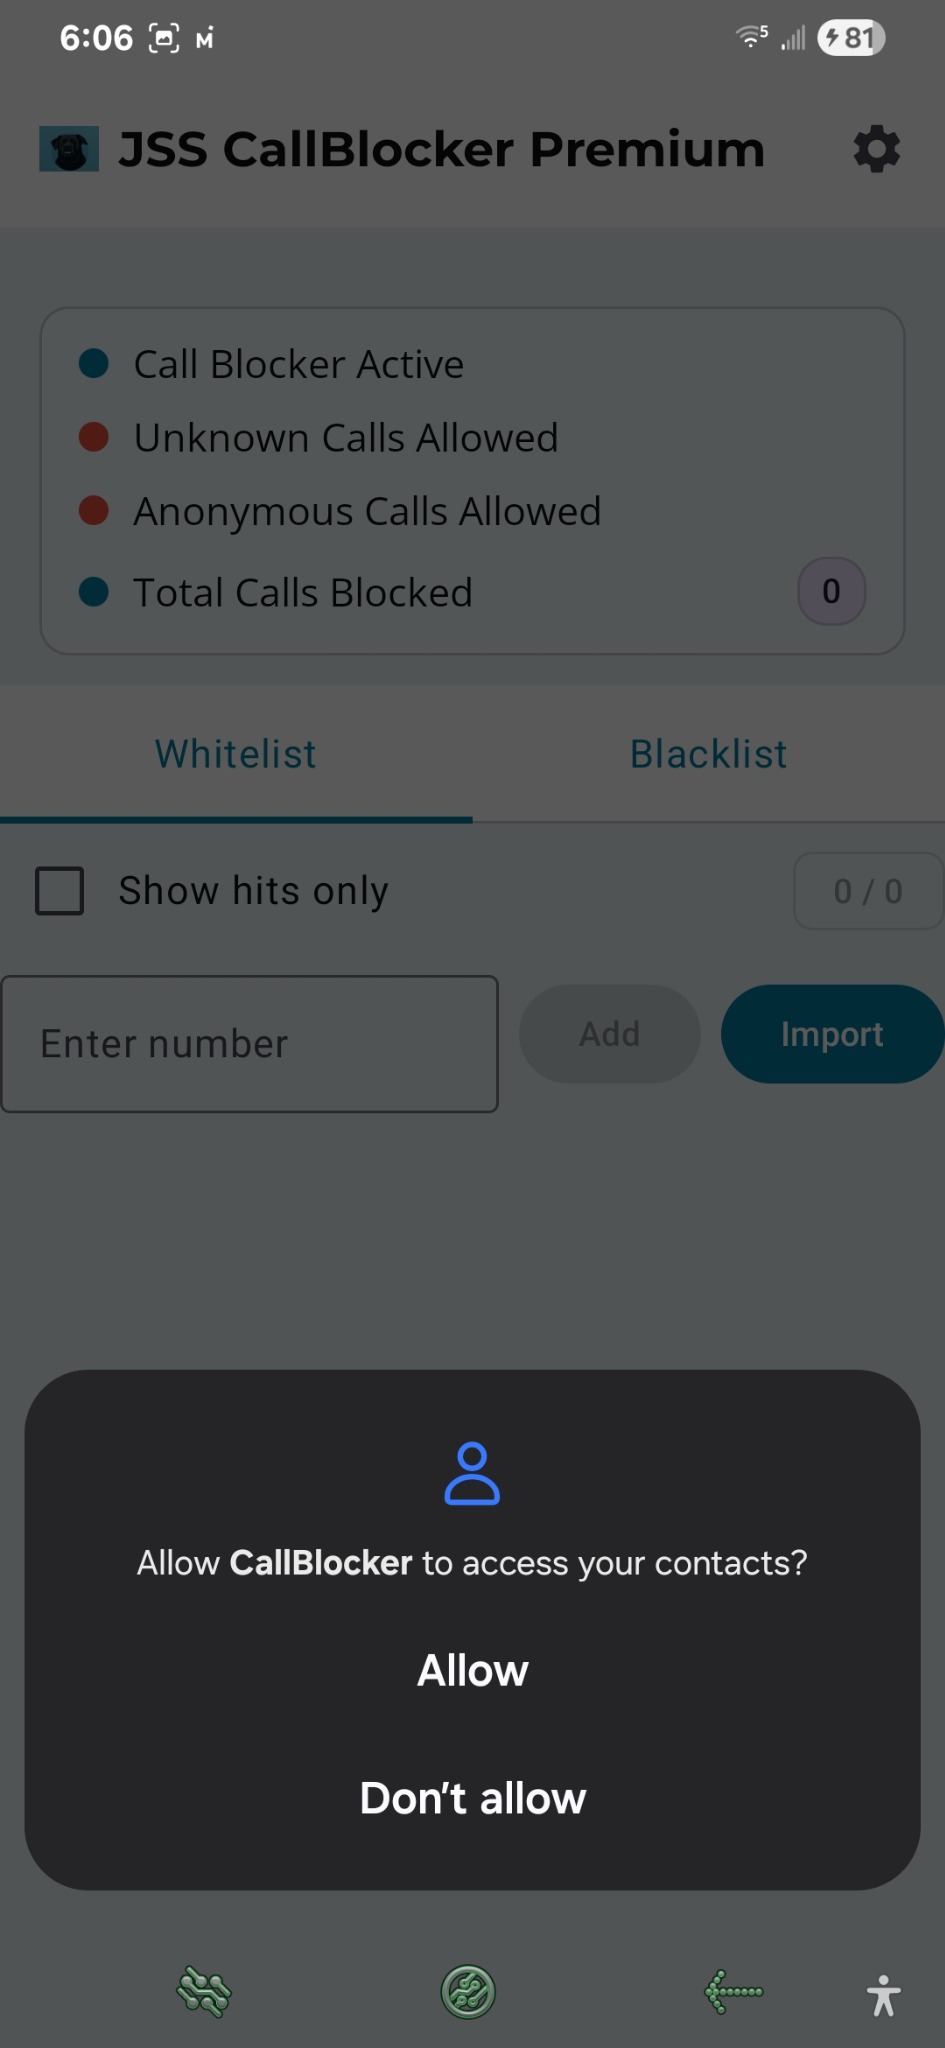
Allow access to your Contacts
This lets the app detect “Known Contacts” during import and when deciding whether to ring or block.
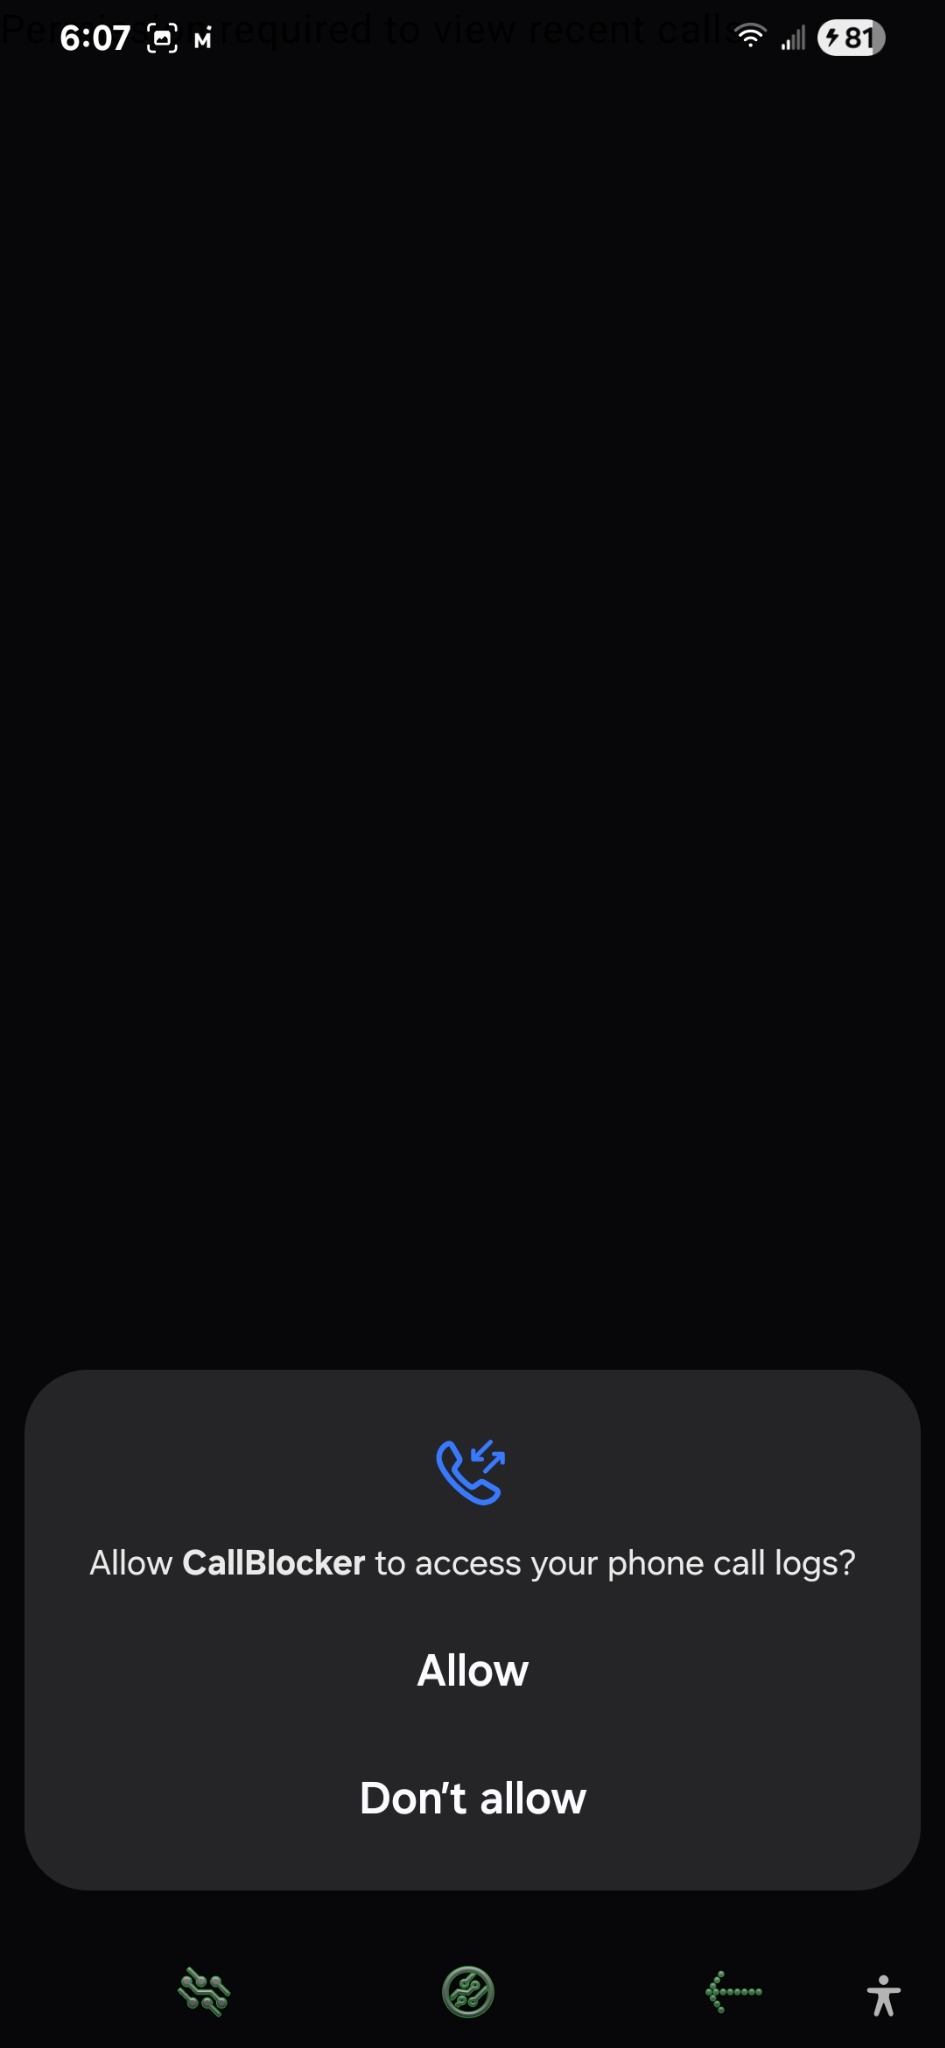
Allow access to your Call Logs
Required to import recent numbers (e.g., the last 30 calls) into your whitelist or blacklist.
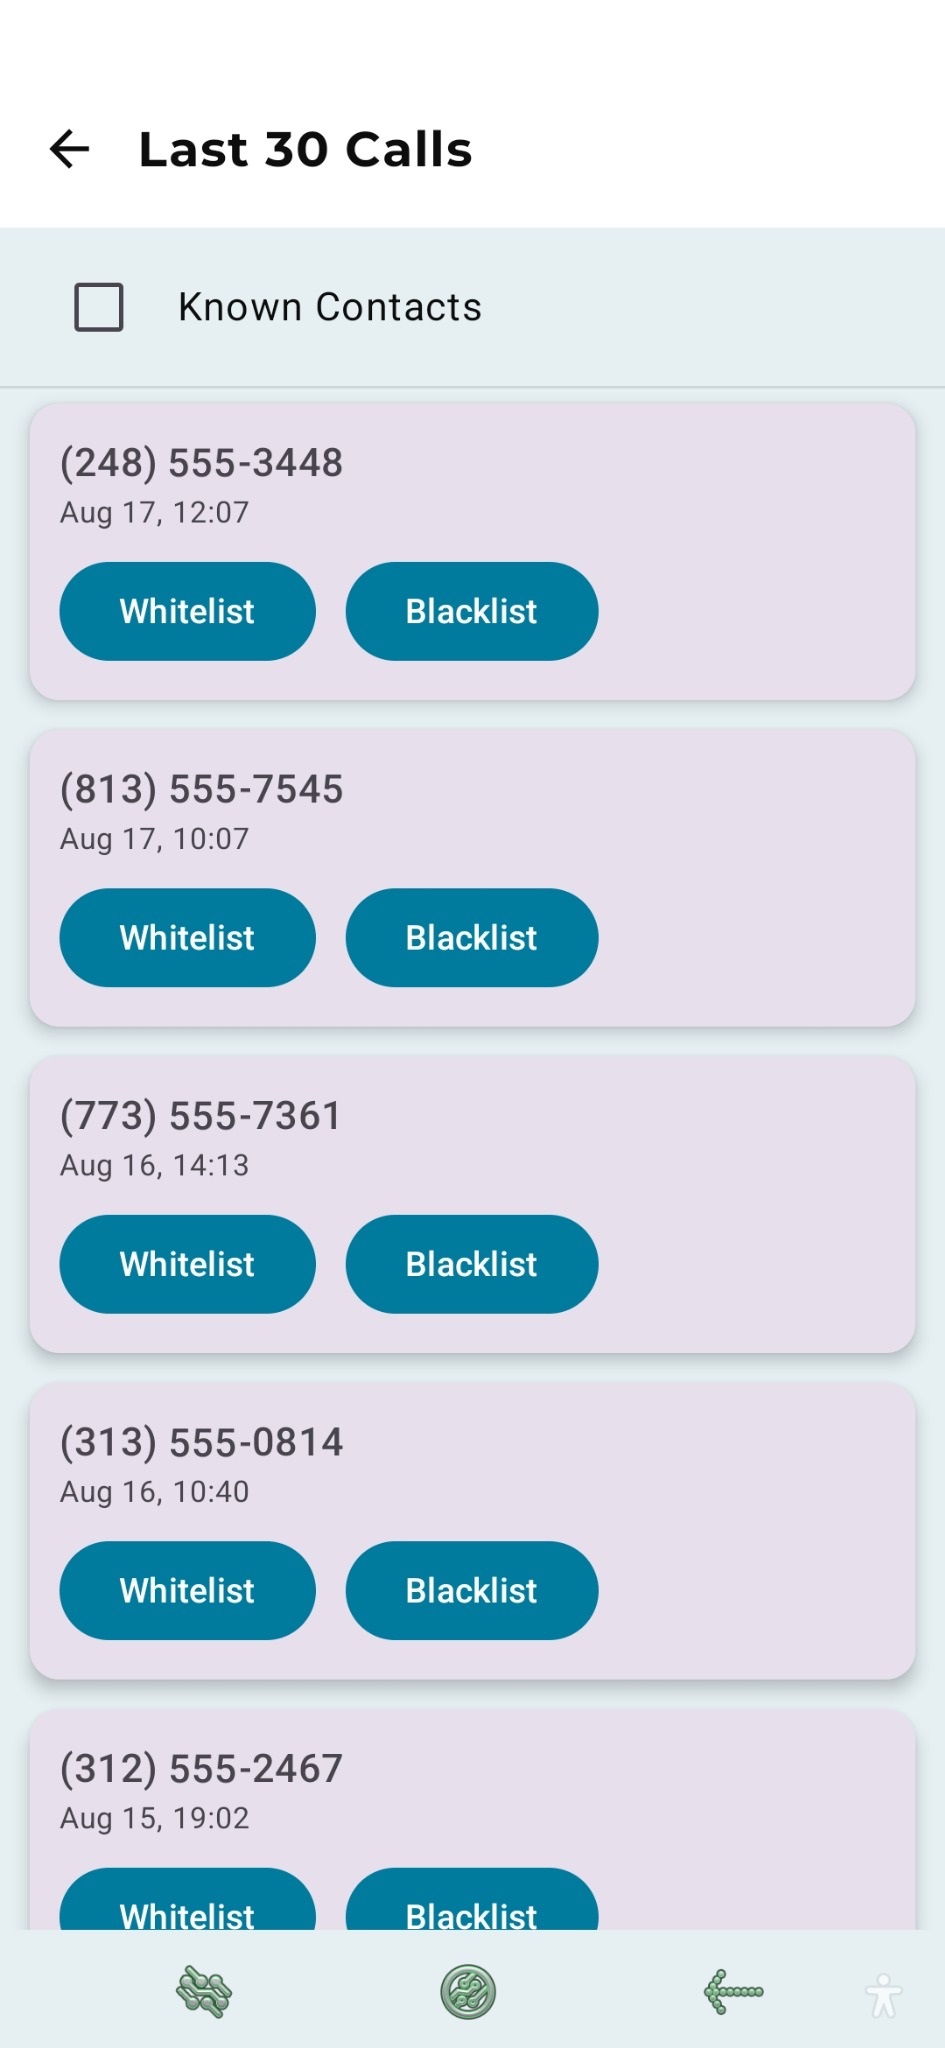
2) Import recent calls
Tap Import on the main screen to pull in your recent call history. Use the Known Contacts toggle to switch between:
- Unknown callers — numbers not in your address book (typical spam sources).
- Known contacts — numbers found in your address book (useful for whitelist).
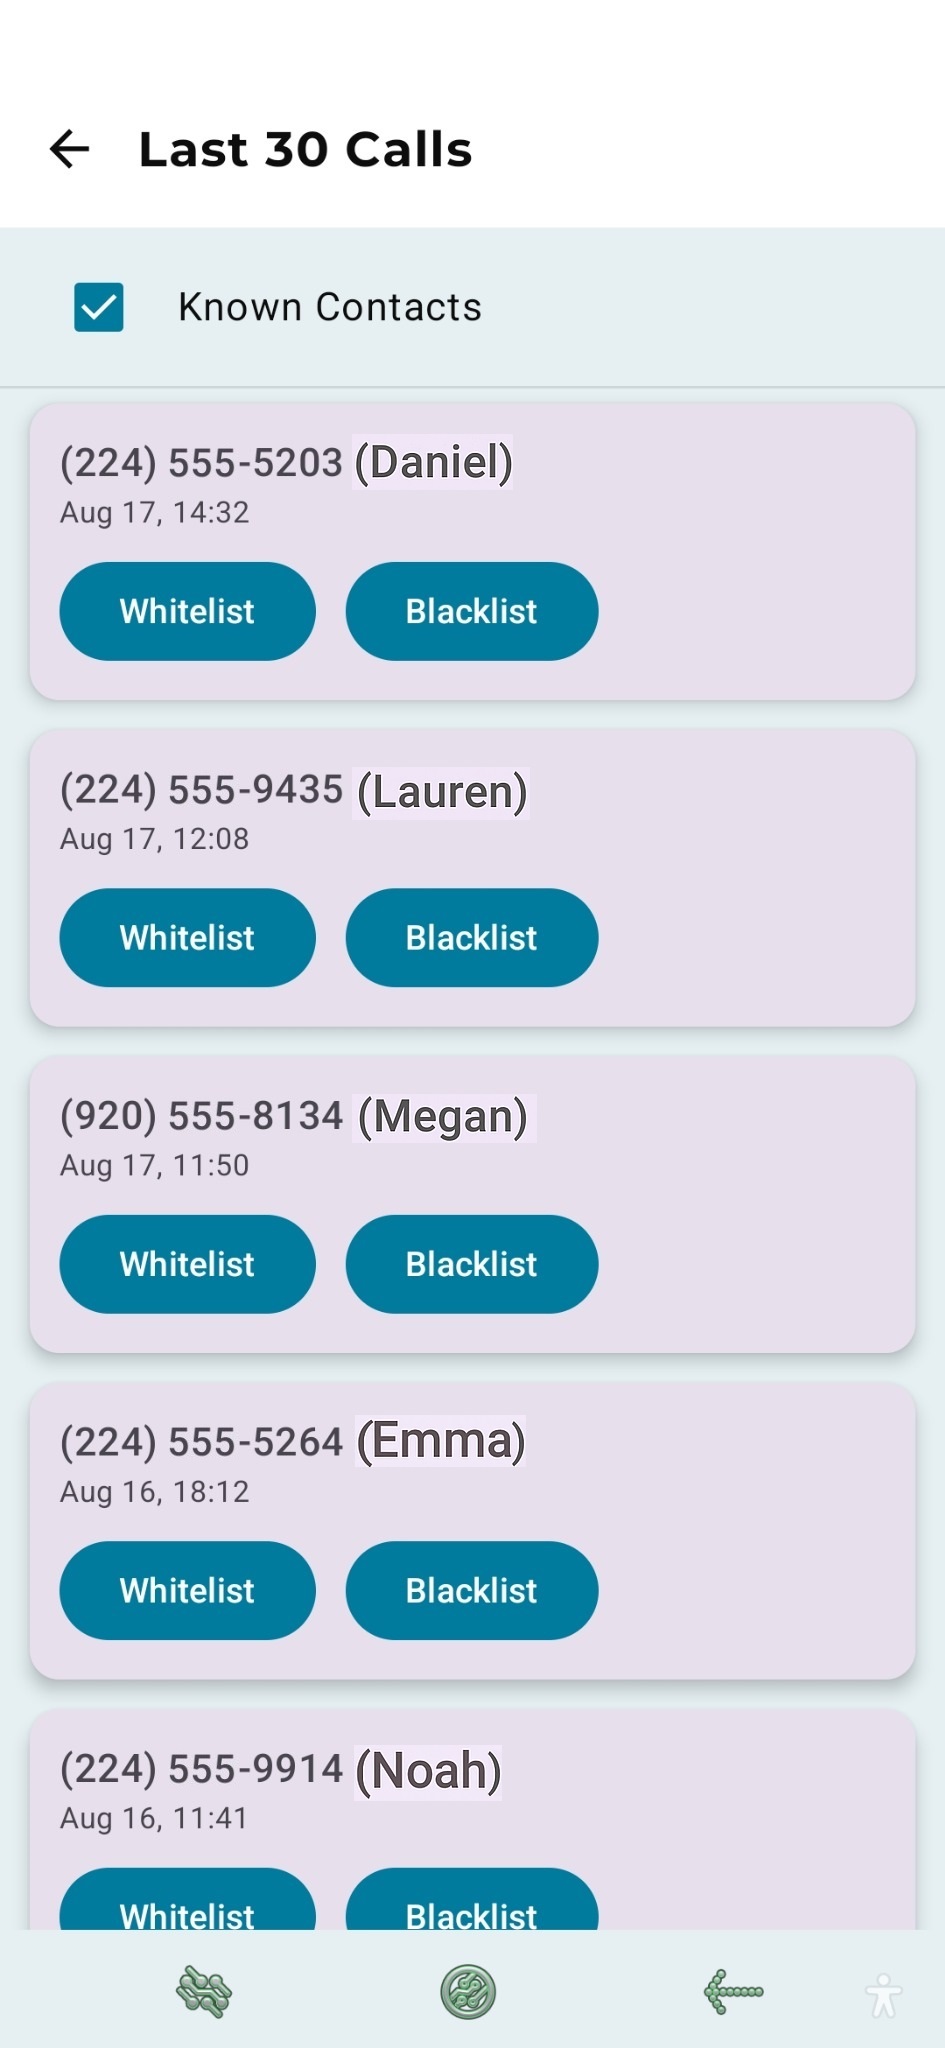
Smarter import keeps scanning beyond the first batch so you don’t “run out” of numbers to import.
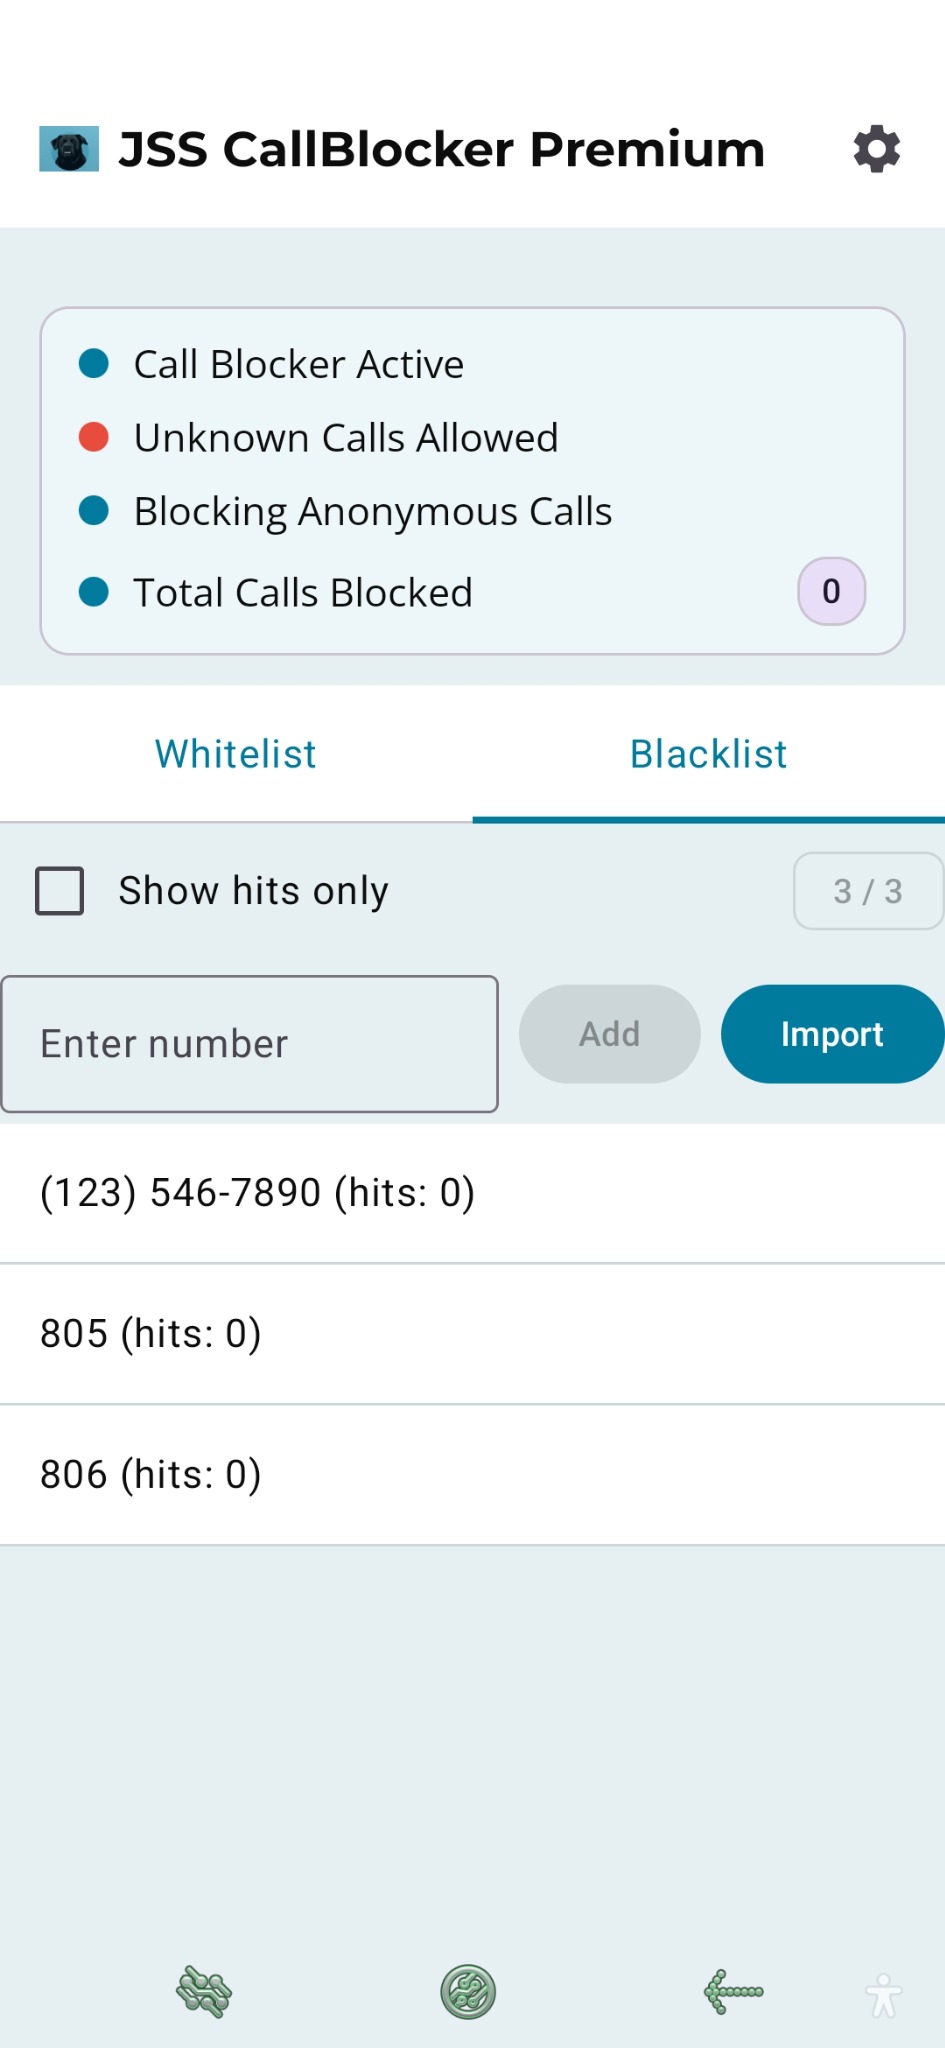
3) Whitelist and Blacklist basics
- Whitelist: always allow calls from these numbers.
- Blacklist: block calls from these numbers.
- Prefix blocking: add a short code (e.g.,
224) to block common spam ranges. - Undo & haptics: accidental swipes are less sensitive, and you can undo quickly.
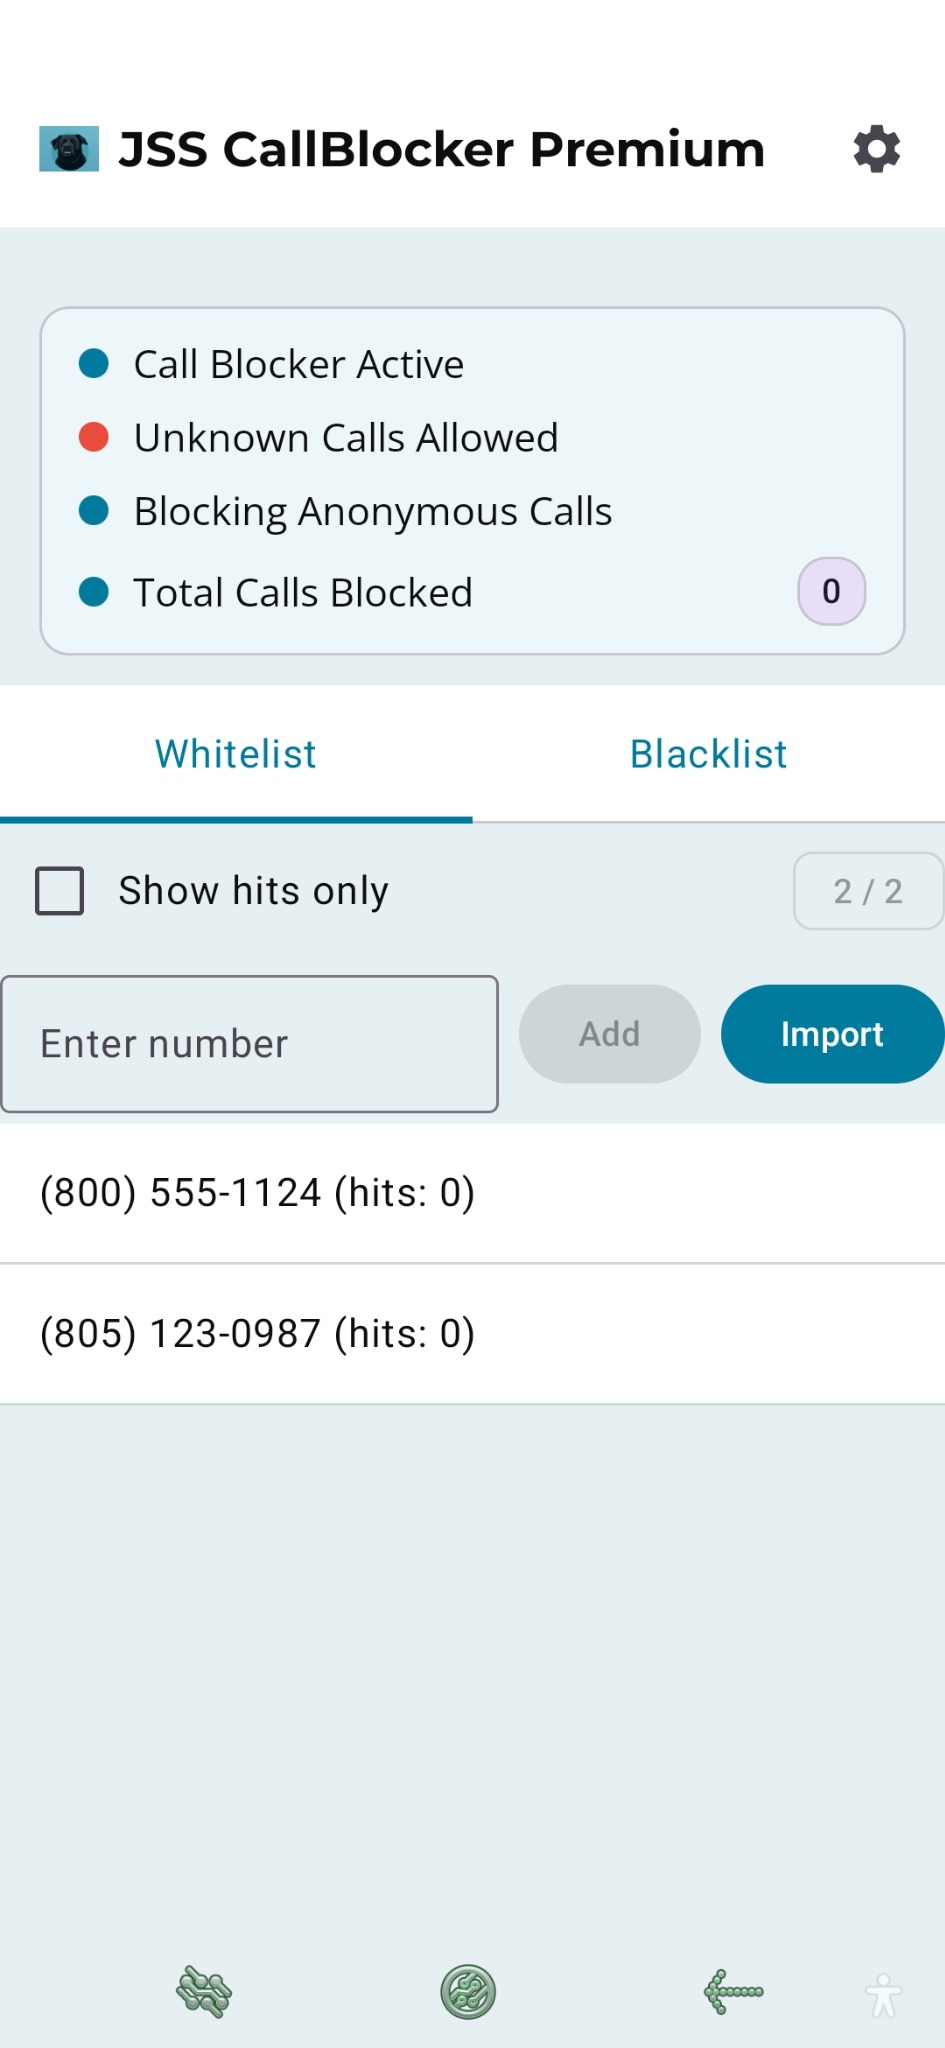
4) Settings you’ll care about
- Block Unknown? (Premium) — send callers not in your address book to voicemail.
- Block Anonymous? (Premium) — block hidden/withheld numbers.
- Encrypted Backup — create/restore backups of your lists (hit counters are not restored).
- Blocked Call Counter — reset the counter from Settings if you want to track from zero.

Privacy & data handling
CallBlocker never sells your data or shows ads. Contacts and call logs stay on your device and are used only to match callers and populate lists. See the Privacy Policy for details.
Trouble during setup?
- If you don’t see calls to import, check the Call Log permission and that you have recent call history.
- Some OEMs restrict background activity; if calls aren’t blocked, remove battery optimizations for the app.
- For test track installs, ensure you’re enrolled on the same Google account as the Play Store on the device.
See the full Troubleshooting page for fixes.
Next steps
Last updated 2025-08-18
See also: Privacy Policy